Neotask Payments
Connect And Review Payments
- Open the company and select Payments.
- Choose Set up payments when no account is connected.
- Complete the provider setup and return to Neotask.
- Confirm the connected state before accepting payments.
- Use the overview and ledger to trace charges and payouts.
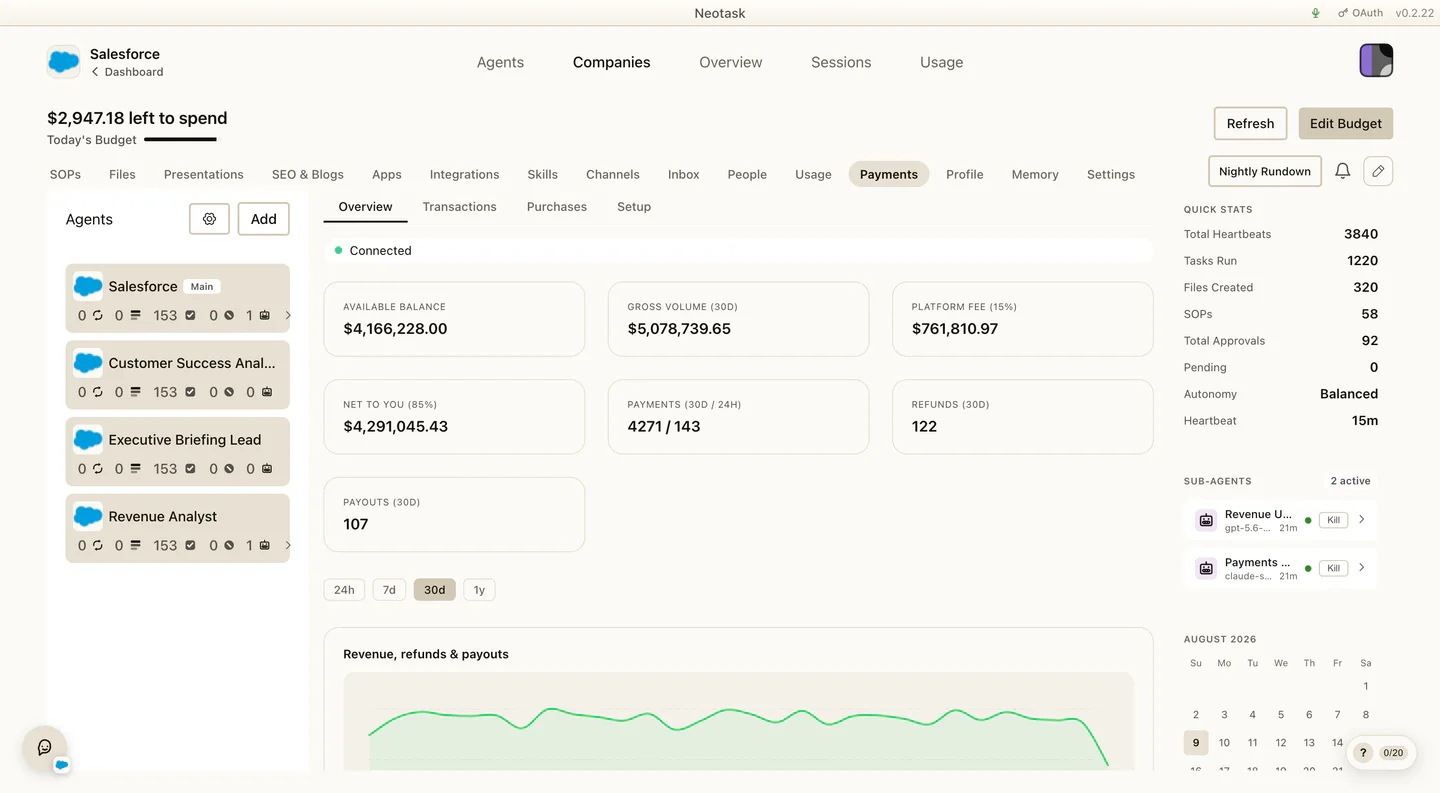
Neotask Payments is the built-in way for your autonomous company to get paid. Sign up once, and your company can accept money from customers with payouts going straight to your own bank account.
What Neotask Payments Is
When Neotask builds and runs a company for you, that company often needs to sell something, a product, a service, a subscription. Neotask Payments is the rail that lets it actually collect that money.
In plain terms:
- Your customers pay your company.
- Neotask Payments handles the checkout and processing.
- The money is paid out to your company's own bank account.
- Neotask keeps the books so everything is tracked.
It is designed so you do almost nothing. You connect your payment account once during setup, and from then on your agents handle the rest.
Who It's For
Neotask Payments is for build-mode companies, companies that Neotask creates and operates for you (as opposed to companies where Neotask only manages something you already run). If your company is meant to sell to customers and receive income, this is the feature that makes that possible.
If your company doesn't take payments, you can simply skip it.
How To Connect A Payment Account
There are two places you can set this up. Both use the same secure connect flow, so it doesn't matter which one you use.
During onboarding (the Payments step)
When you create a build-mode company, onboarding includes a Payments step:
- You'll see the Neotask Payments card with a Set up Neotask Payments button.
- Clicking it opens a secure setup window where you provide the details needed to verify your business and add the bank account you want to be paid into.
- When you finish those hosted steps, Neotask detects it automatically, you don't have to come back and click anything in most cases. There's also an "I've finished, check status" button if you'd like to refresh it yourself.
Later, in Settings → Payments
Every build-mode company has a Payments section in its Settings tab. It shows the same Neotask Payments card with a Set up Neotask Payments (or Resume setup) button. Use it any time after onboarding to connect, finish, or review your payment account.
What "Connected" Means
Connecting isn't just "I clicked the button." Your account is only marked Connected once it can genuinely take and move money. Behind the scenes there are two things that have to be switched on:
| Capability | What it means |
|---|---|
| Charges enabled | Your company can accept payments from customers. |
| Payouts enabled | Money your company earns can be paid out to your bank. |
Only when both are on does Neotask show the green Connected pill. Until then, your company can't collect payments yet.
Your connection can be in one of a few states:
| Status | What it means for you |
|---|---|
| Not started | You haven't begun setup yet. |
| In progress | Setup is started but the verification steps aren't finished. Finish them in the secure window. |
| Pending | You submitted your details; they're being reviewed. |
| Connected | Everything is on, your company can accept payments and receive payouts. |
| Needs attention | Something is blocking your account (e.g. more information is required) and needs you to resolve it. |
| Disabled | The payment account was disconnected. |
The status you see always reflects the real, verified state, Neotask reads it from the source of truth, never a hopeful local guess. While setup is in progress, Neotask quietly re-checks for you so the moment you're done, the card flips to Connected.
How Money Flows To Your Bank
Once you're connected, the flow is simple:
- A customer pays your company.
- The payment is processed through Neotask Payments.
- The money belongs to your company and is paid out to the bank account you added during setup.
Your earnings land in your own account, Neotask is the rail, not the destination.
The Platform Fee
Open Transactions to trace the payment, fee, and net amount recorded for each charge.
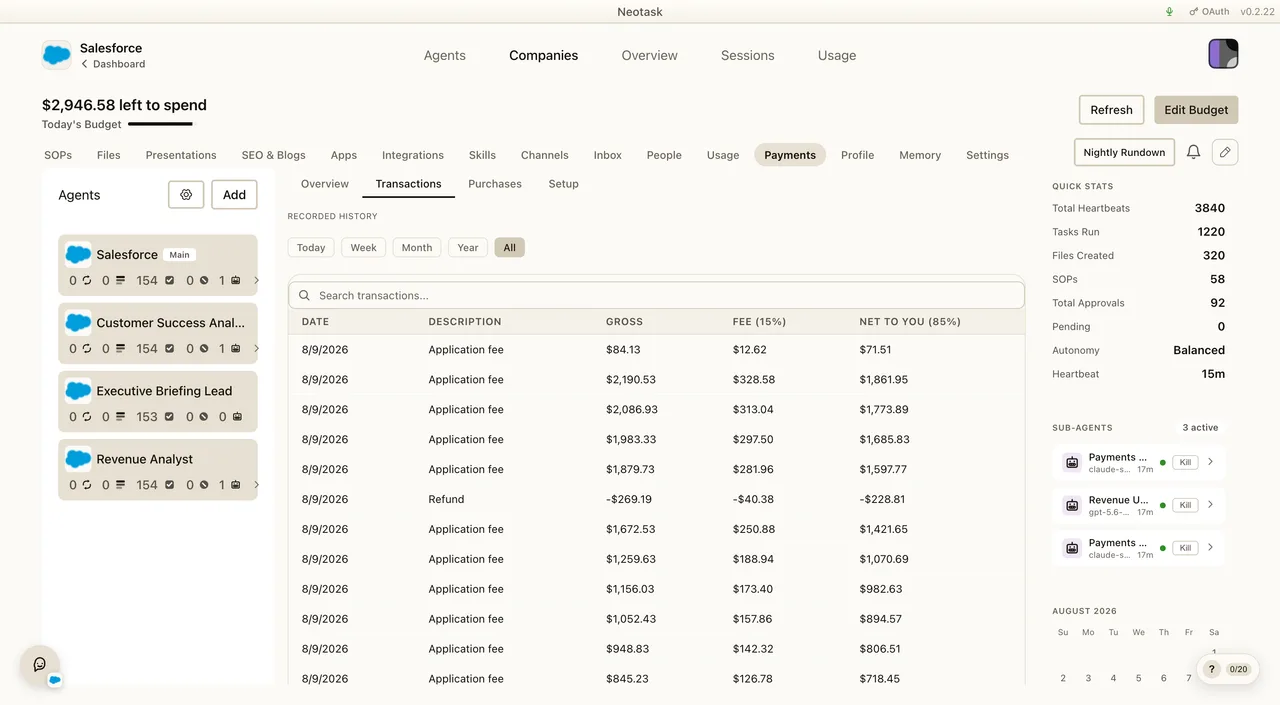
Neotask charges a 15% platform fee on payments your company collects through Neotask Payments. Concretely:
- Your company keeps 85% of each payment.
- Neotask's 15% fee is taken from the payment automatically.
A couple of things worth knowing:
- The 15% fee is separate from the standard payment-processing fee that any card payment incurs.
- The fee is calculated on the gross amount of each payment and recorded for you, so there's a clear trail of what was collected, what the fee was, and what was paid through to your company.
Managing Or Disconnecting
You manage Neotask Payments from the company's Settings → Payments section at any time:
- Review your status, see whether you're Connected and whether charges/payouts are enabled.
- Finish or resume setup, if you started but didn't complete verification, pick it back up here.
- Update your details, re-open the secure setup window to change business or bank information.
If a payment account is ever disconnected or disabled, the card reflects that, and your company stops being able to take payments until it's reconnected.
You Can Set This Up Later
Neotask Payments is deferrable, you don't have to finish it during onboarding. In the Payments step you'll see a "Set up later" option. If you choose it:
- Onboarding stops blocking on the Payments step, so you can finish creating your company.
- Your company can't accept payments until Neotask Payments is connected.
- Any payment-related tasks your company would do are kept as drafts, they won't run for real until you've connected.
When you're ready, just go to Settings → Payments and complete setup. Choosing "Set up later" never means you're connected; it only postpones the step.