Neotask Billing Click Paths
Use this page when someone says:
- "Where do I update my payment method?"
- "How do I add credits?"
- "Where is billing in the app?"
- "How do I turn on auto top-up?"
- "How do I switch between credits and my own API keys?"
Main Billing Path In The Desktop App
Billing controls live in the main app settings.
Exact path:
- Click the avatar in the upper-right corner of the app.
- Click Settings.
- In the left settings menu, go to the AI section.
- Click Credit top-up.
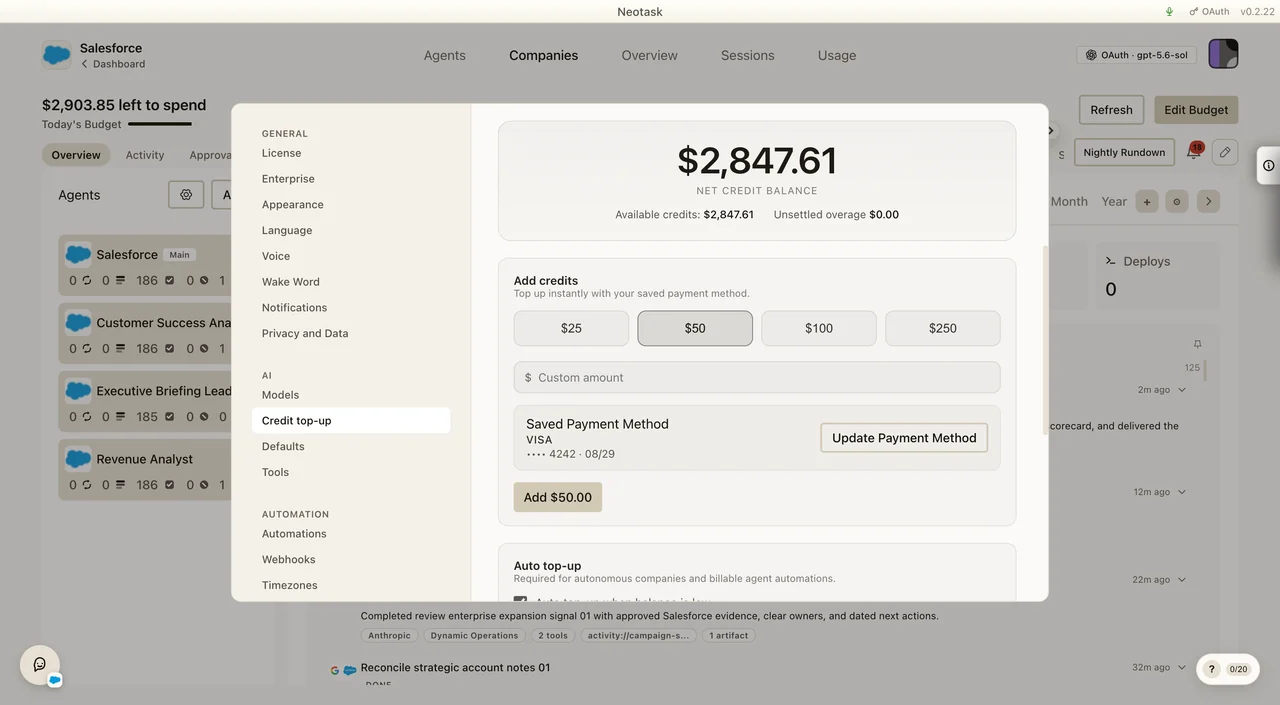
The top of the screen shows the net credit balance, available credits, and unsettled overage.
To Update The Saved Payment Method
- Open Settings.
- Go to AI → Credit top-up.
- Find Saved Payment Method inside the Add credits panel.
- Click Update Payment Method.
To Add Credits
- Open Settings.
- Go to AI → Credit top-up.
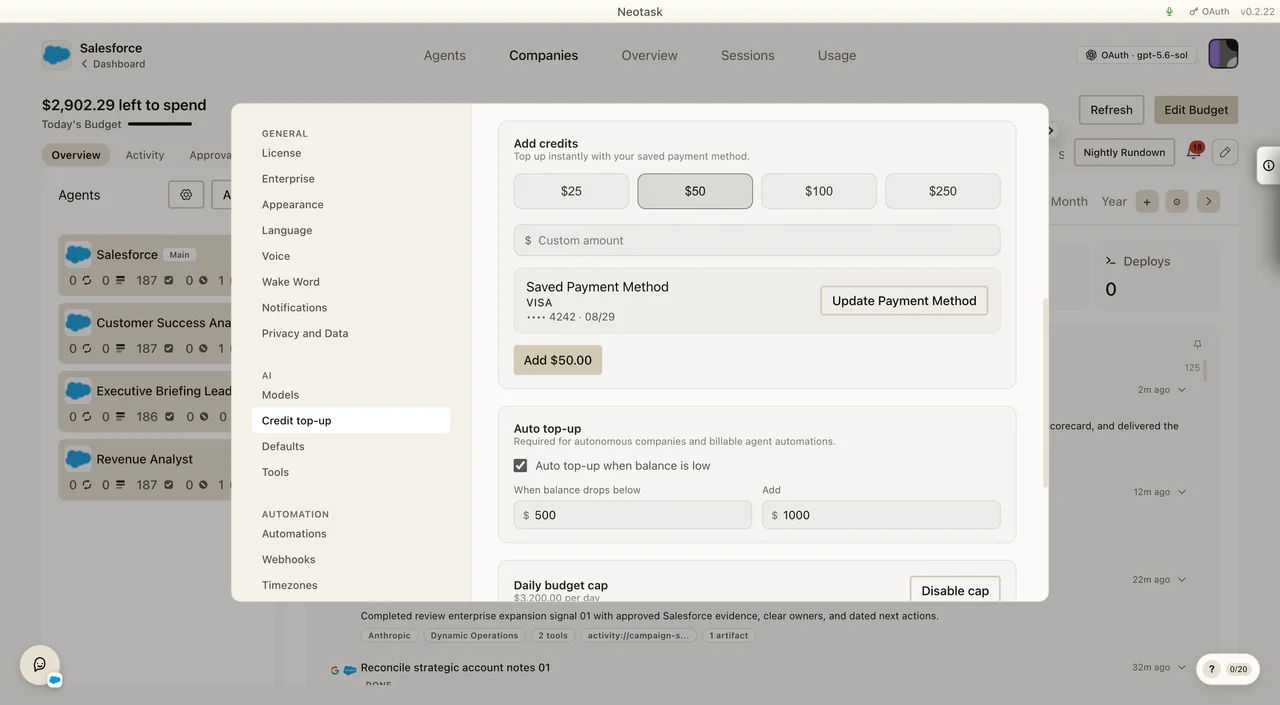
- Select a preset amount or enter a custom amount.
- Click the button showing the selected amount.
- Confirm the purchase.
To Enable Or Change Auto Top-Up
- Open Settings.
- Go to AI → Credit top-up.
- Scroll to Auto top-up.
- Turn Auto top-up when balance is low on or off.
- If enabling it, set the threshold and top-up amount.
- Confirm that the Daily budget cap is configured for autonomous companies or billable automations.
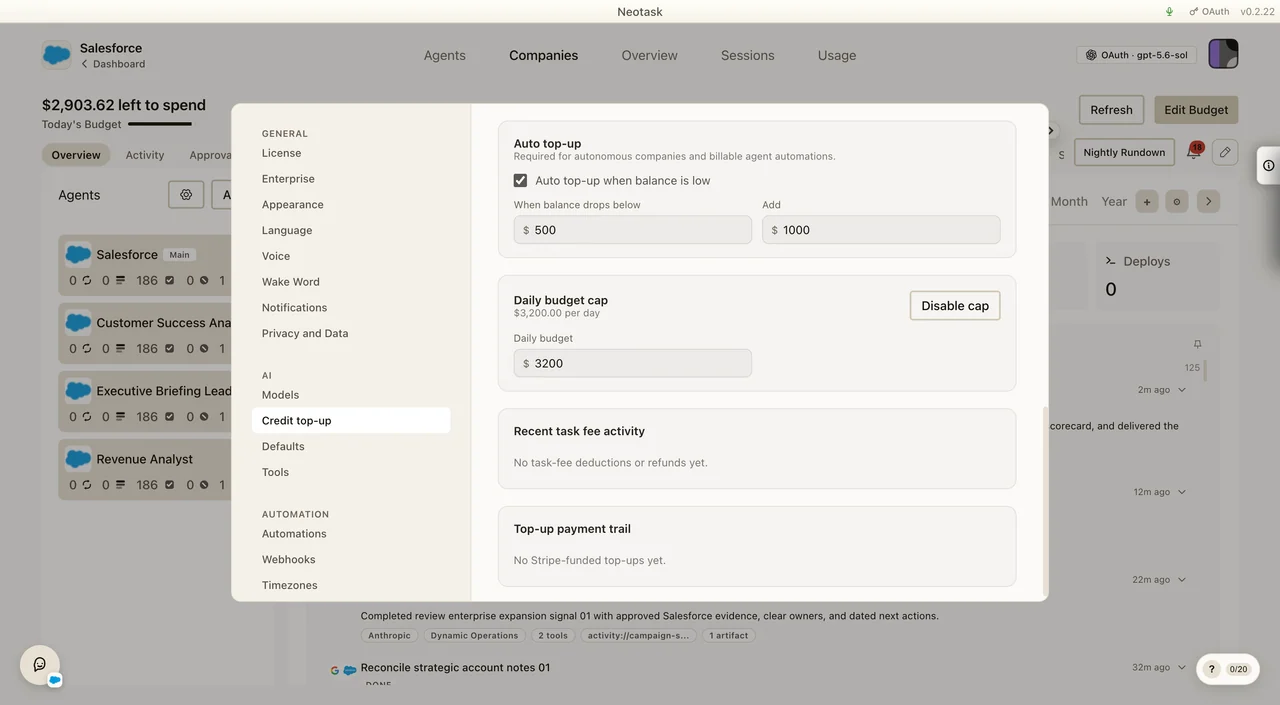
Automatic top-ups for scheduled task billing never exceed the remaining daily budget headroom for that day.
To Switch Between Billing Modes
Use this when the caller is confused about credits versus their own keys.
- Open Settings.
- Go to AI → Models.
- Use the connection options:
- Own API Keys
- Credits
Own API Keys is the BYOK path.
Credits is the hosted-billing path with payment method, top-up, and auto top-up controls.
What Support Should Clarify
- If the caller wants to manage card details or buy usage, guide them to Credits mode.
- If the caller wants to link provider keys instead of paying through hosted credits, guide them to Own API Keys.
- If the caller says billing is blocking the app, confirm whether the issue is:
- payment method missing
- credits depleted
- auto top-up disabled
- daily budget missing or exhausted
- scheduled task-fee balance exhausted
- subscription or entitlement drift